
Monday, January 30, 2012
Painting Dallaire
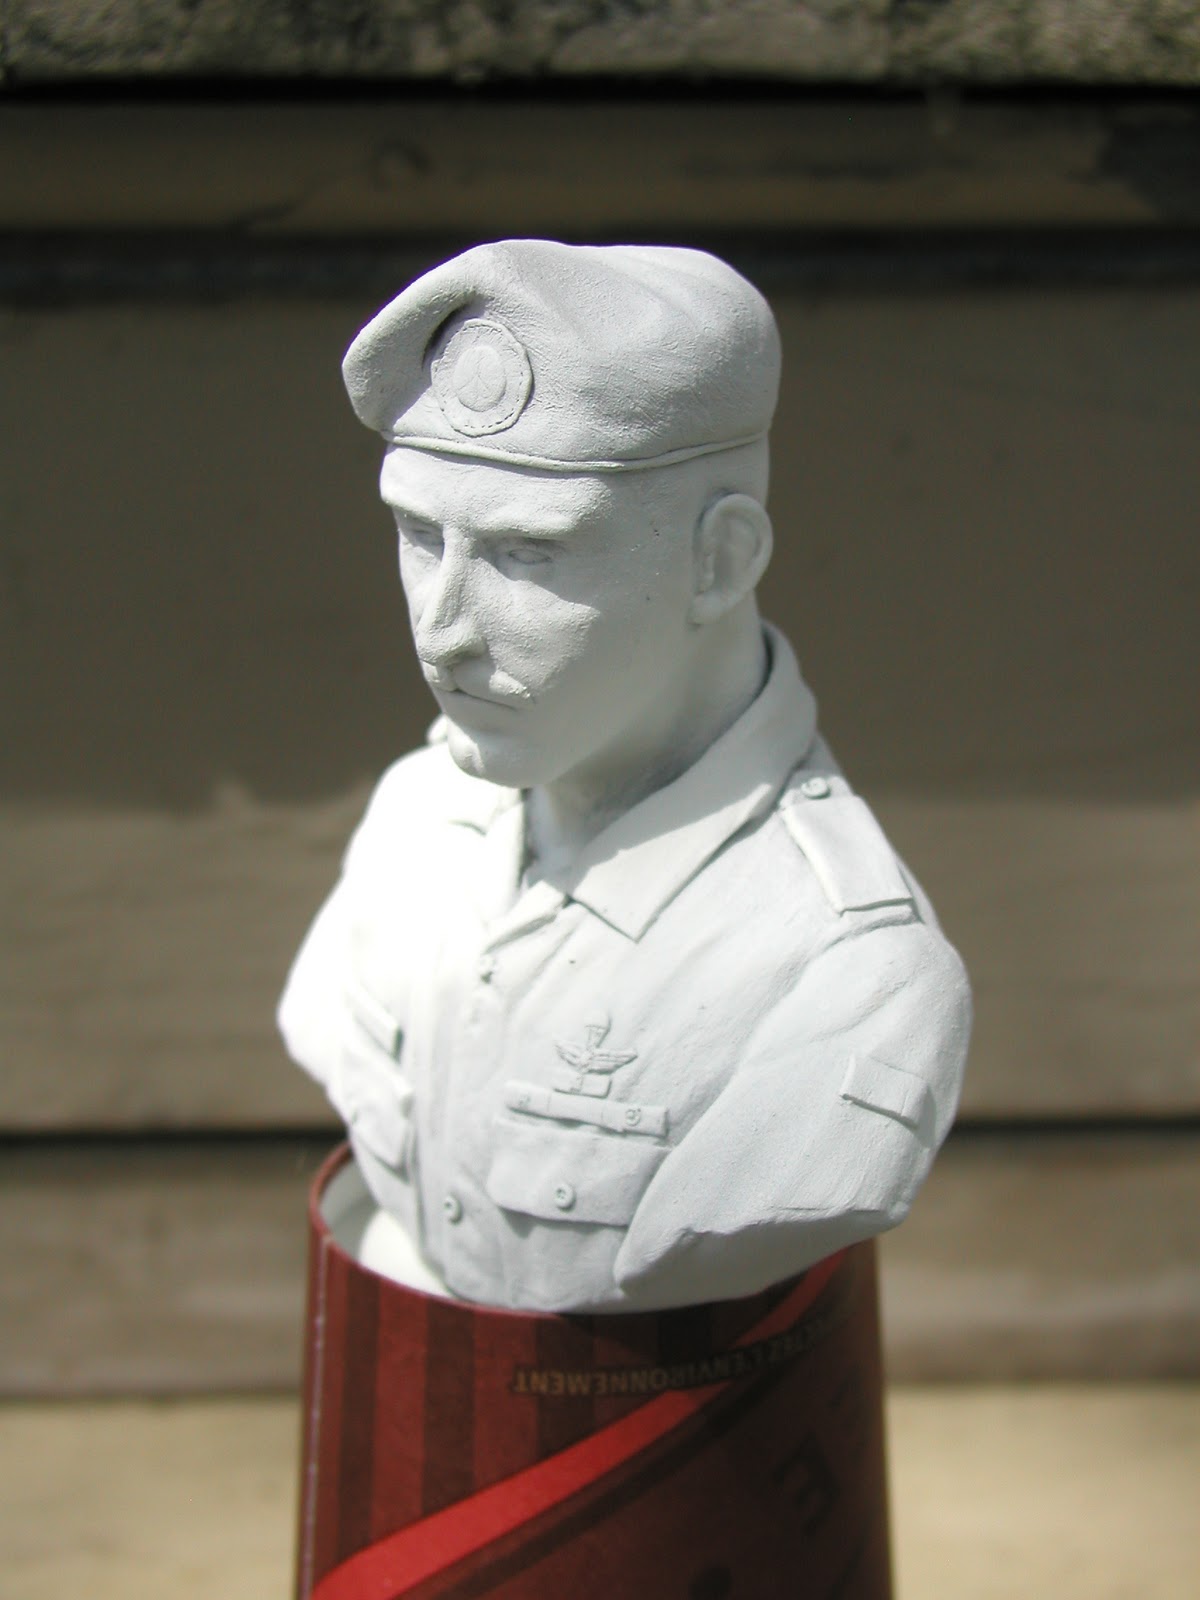
As noted below, I undercoated the Dallaire bust with Games Workshop Skull White spray primer. It’s a bit expensive for spray paint but I haven’t found anything else as good, despite attempts to replace it with generic auto primer from Home Depot. The Games Workshop paint has the benefits of being matte, of having good coverage without obscuring detail, combined with good tooth to take acrylic paints.
I initially painted the bust’s face in Liquitex professional bottled acrylics. I was quite happy with the result but thought I could do better. The face seemed a little too contrasty for my liking. So I repainted him in Vallejos and Citadel inks (which luckily I still have despite the fact that Games Workshop has stopped making them). As an aside, I found after a quick Google search that many companies make water based inks - so the loss of Games Workshop’s line is not as tragic as it may seem.


When comparing the two paints (i.e. Liquitex vs. Vallejos), the differences in the two products and the techniques they demand are readily apparent. The Liquitex face looks rough and cartoonish while the Vallejo version looks photo-realistic. Same brushes and same technique so the only real difference is the paint. I think the results speak for themselves.


Some other significant points – the signature UN blue beret benefits from the addition of a sky blue ink. This goes a long way toward brightening it up. I actually had to tone it down a bit with Vallejo washes so he didn’t look fluorescent.

· The name tag instilled fear in me. A Canadian Forces name tag is two part plastic with gloss black over white. The name is etched in to expose the underlying white ground. I had to paint the tag free hand in very small scale to simulate the precision of type face – white paint on black. Needless to say, with this type of contrast, any imperfections would be instantly apparent. The Gods of modelling were with me and I pulled it off first crack with no adjustments required. I think I am proudest of this single element of the model.

· Similarly, the insignia on the epaulettes, including crown, crossed baton and sword, maple leaves and the “Canada” text were also very intimidating. Both epaulettes had to look the same. All elements of the insignia had to go on free hand at a very difficult angle – i.e. Painting downward on top of this shoulders. The “Canada” was the worst. After several misfires I painted it on in oils and waited for the text to dry. That failed but did serve to provide a textured ground for my next attempt. Finally, I realized that the high quality Liquitex paint would come into its own here. Once I switched to that paint, “Canada” was a breeze.


· The maple leaf on his shoulder and the UN patch on his other side were also daunting. But after multiple misfires I got them done. The first time I painted the UN patch I did a great job but found that I had not left enough room for the last “s” in “United Nations.” Damn! Had to start all over!
The texture of the shirt was a challenge. I got to use the Vallejo glazing and shading techniques I have hear so much about. Subtle gradations in shade applied very thinly. A large fan brush to ensure a reasonable blend. Thank G*d for the stay wet palette!


All in all a success I think. It looks like Dallaire. Several people, including my lovely wife, told me so without any prompting. I tried to get his look of stress and a bit of a blank look indicative of shell shock or PTSD`s “1,000 yard stare.” And the uniform is very evocative….shirt sleeves order with the light Khaki shirt but brought to life with the vibrant blue beret, the forest green epaulettes and various colours in the medals, and insignia.


The base is African rosewood from Thomas Art Bases and the label was made on my PC. Text box reverse printed on a plastic overhead page and then sprayed on the reverse with gold paint. Works great!


I sent photos of the finished product to the General himself c/o the Canadian Senate in Ottawa so we shall see if he responds.And now on to my next project.
Sunday, January 29, 2012
Sculpting Dallaire"s portrait
I sculpted Dallaire in the same manner I always use. Shape an egg shaped orb of putty, pinch the back for a holding spot, and begin to shape the facial features. I use an Xacto knife to shape the major planes of the face, then rubber colour shapers to futher define them. The eyes were drilled with a dremel, putty orbs were added for eyes, and the lids were sculpted in. When I finished the facial features, he looked like this. You can see the pinched putty used to hold the face for sculpting in the middle photo below.


Next step was to cut-off the holder and shape the back of the head. Once that was done, the ears were shaped and haor added. Finally, the beret and beret badge wer added. The beret's surface was roughened with putty diluted with sculpey dilutant and a paint brush. The beret badge was sculpted to look like Dallaire's own individual model, a subdued cloth version rather than the metallic one used by many UN soldiers. The details were referenced to screen captures from DVD's like "Shake Hands With the Devil" (documentary) and "The Ghosts of Rwanda." Even the Canadian cinematic release of "Shake Hands With the Devil" starring Roy Dupuis is a good refernce source as Dallaire loaned some of his insignia for Dupuis to wear on set.
After addition of the neck, final baking and after brushing on dilutant, he looked like this.


You can see the mole on the right side of Dallaire's face and the small distinctive bump on the left tip of the General's nose. I think small touches like that make the difference between an adequate portrait and something that is truly evocative of the person.


Once the face was done, I proceeded to build the chest of the bust. The chest was built up on a wooden spindle. The collar of his shirt was particularly challenging. The sculpey had to be rolled thin enought to look like a shirt collar. Luckily super sculpey firm is also quite strong and thin material can be added with some confidence that it won't break after baking. Buttons were added and a needle was used to indicate thread holes in the buttons. Buttons and other minor insignia were added from magicsculpt.
Prior to priming with matt white spray paint (Games workshop), I added a name tag from plain plastic sheet.


Setting the model on an upturned Tim Hortons coffee cup with a central hole in the base to accomodate the wooden spindle is part of my traditional approach for busts.
Subscribe to:
Comments (Atom)